Last Updated on February 4, 2019 by Amit Abhishek
Everything that is ever built or created has a self life; and it takes proper care and maintenance to prolong their life span. An electrical motor with its five major parts; rotor, stator, winding, terminal box and bearings require overhaul from time to time to ensure safe operation. If not; the first thing which happens is the gradual decrease in insulation resistance.
This leads to short circuit and failure of electrical motors. Thus to ensure safety and operation of electrical motors; the first line of defense is to add proper ventilation and anti-condensation heaters to maintain dryness. But still continues deposition of dust, oil, grease and moisture; together with the growing age of insulation makes it even more important to overhaul the system.
The other major reason why an electric motor is overhauled; is when it came in contact with water. There is a general understanding to overhaul all electric motors; in case of engine room flooding or water leaks. The process involves complete de assembly of electric motor, visual inspection, insulation checks, repairs, final check and reassembly.
Let us learn in details about what that actually is, the process involved and what they mean to the maintenance of electrical motors.
Requirements And Safety For Maintenance Procedure
It is required to take safety precautions before maintenance or repair; whether on ship, working on shore based industry or in your own workshop. Take proper permission from concerned authorities; before working on any of the electrical motors. If required give advance notice; and prepare documentation for the repair.
Arrange all insulated and special tools required for the repair following manufacturer guidelines. Wear all personal protective equipment such as; protective cloths, gloves, shoes and most important hard hat available on ship and industrial complex. You can get all of these easily on amazon from the link over here for your workshop or personal use.
Isolate the designated electric motor from main power supply; and drain the associated connected system before inspection and repair. Make sure the motor is electrically grounded; to the ships hull or ground neutral as in industries. Once done isolate any electrical connection to the electrical motor locally.
Make sure all critical spares to be needed are available before hand on ship. Put Designated “MAN AT WORK” sign in different parts of the engine room as in ship or workspace in industry. Now start the overhaul procedure from dismantling of motor cover and initial visual inspection; about which we will discuss below.

Maintenance Procedure To Overhaul Electrical Motors
The main aim for the maintenance of electrical motor is to ensure; low contact resistance, high insulation resistance, bearing lubrication, proper air gap and overall dryness of the motor assembly. Ideally the motor have very less air gap between the rotor and stator which; gradually decrease even further over time as the shaft deviates from its rotational axis.
Under no circumstance the rotor and stator winding’s should tough each other; as it will be uneconomical then to repair the motor. Thus electrical motors are overhauled and repaired based on their working hours. If you pay attention to your maintenance checklist provided; you will notice the whole operation consists of five major part.
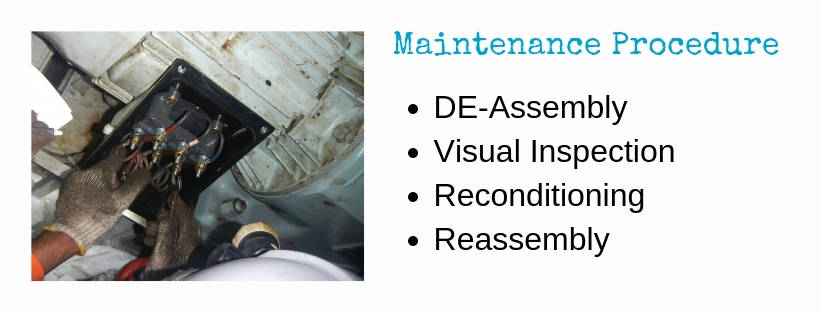
The de assembly, visual inspection, cleaning, tests, repairs, bearing lubrication and repair, reassembly and performance checks. We will discuss in details about each of them below on one on one basis.
1 ) De-Assembly of Electric Motor
The first step in dismantling electrical motor is to decide whether to dismantle in place or out of place; based on its size, orientation and ease of dismantling. Once decided isolate the pump electrical supply; open local connection point and check for insulation resistance. Once done; isolate the pump locally removing wires connecting to different terminal points.
Separate the motor assembly with any associated system such as pumps and compressors. Now using a chain block slowly lift the motor assembly and put it horizontally on the plane surface retaining all of its shims, nuts-bolts and other associated hardware.
Now using a spanner of definite size or wrench remove all fasteners ( nut-bolt ) from the motor front cover. See if the cover is easily removable or not; if not apply a gentle tap from soft hammer all around the cover. Now remove the cover or housing and put marks on it; then repeat the process on the other side of the motor on end housing or cover.
Some times you may be required to remove the bearings from shaft. In one such condition use a hydraulic or mechanical bearing splitter with small and medium electrical motors; while use a spring loaded hydraulic bearing puller for large motors as on ship and heavy industries. A bearing splitter set cost between 40 to 120 dollars in average; click over here to check its current price on amazon.
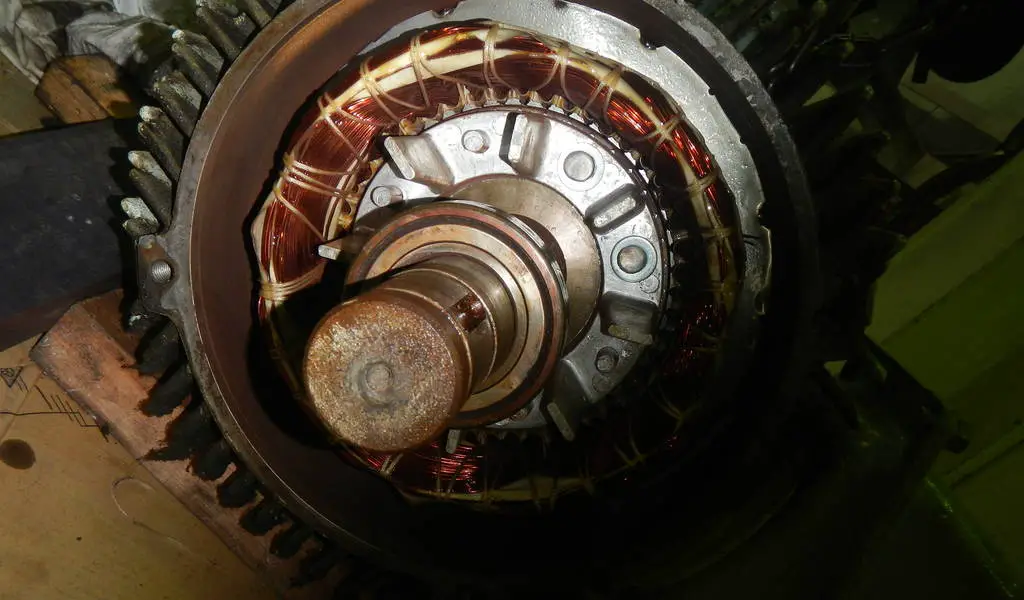
Now Based on the size of the motor use chain block or hands or hydraulic roller assembly to remove its rotor. Give extra care to ensure under no circumstance the stator winding touch with the rotor; during the process as it damage both rotor and stator assembly. Once done the motor is ready for inspection.

2 ) Visual Inspection of Electric Motor
The first thing which we ever look for in electric motor once dismantled; is the signs of dust and moisture. Dusts are the sole contributor of damage due to local over heating; while moisture leads to sudden decrease in insulation resistance. We look upon the stator, its winding’s, core, rotor assembly and bearings; along with seals, brushes and their holders if present.
We look up-close at the stator winding’s for any sign of damage or local over heating. Winding’s tends to loose their original colour when they are subjected to over heating. Carefully examine its core for any signs of running or damage due to any form of contact with the rotor assembly; mostly caused due to worn down or faulty bearing.
Many a times you can easily notice the burned out smell as you disassemble; caused due to over heating of winding’s in recent time. Next give a quick look at the rotor assembly for any signs of damage; as its generally require little to no service in the entire motor life. Most rotors are laminated using steel core which further helps detect any signs of damage.
Once done; the only two things you need to pay attention to are the ventilation ducts and bearings health. Electrical motors with open ventilation system; generally have the problem of chocked or too dirty air inlet ports. These ports needs to be in good condition along with any associated fan; to provide adequate cooling.
To detect if the bearings have worn down or damaged; by listening to the sounds it makes and freeness when the shaft rotates. The other method is by using portable vibration detectors. But in most case we just replace them based on their running hours.
3 ) Reconditioning An Electric Motor
Reconditioning electrical motors means cleaning, repair and replacement of parts if required. Start by cleaning ventilation ducts in the motor followed by the winding’s and associated parts. Use a soft blow of air at not more than 1.8 bar to blow-off the dust from surface. If required you can also use non ionic water based solvent; to clean off the debris, dust and foreign particles.
In case the motor is flooded with sea water on ships and marine application; flush the motor with fresh water. Then using an low power heater or lamp; dry up the system with proper arrangement ( using external fan ) to assist vapors to get out of the motor assembly.
In places where you have found signs of overheating; find the possible cause and fix it. Use similar tactics such as heating coil and winding’s to improve insulation resistance. Do not heat the coils or winding at more than 120 degree Celsius; using an electric heater or winding’s oven.
Remove and replace bearings with a new one based on running hours, damage or signs of misalignment. If there is only a slight increase in vibration; this can be solved by pulling the bearing out, cleaning and then applying proper grease and lubrication. If the winding’s seems to have lots of burn marks, damage or is just hard to recover; its time to burn and strip the old winding and rewind accordingly.
4 ) Reassembly of Electrical Motors And Final Test
Heat up the winding’s for one last time and check insulation resistance to compare with the previous readings. Now clean the rotor shaft with a nice clean cloth or tissue; and apply light oil or grease on to it. Place a new bearing along the shoulder of the rotor shaft. Slowly push the bearing evenly till it go freely; then apply a soft tap of hammer on the inner edge of the bearing to push it further towards its default position.
Now place the bearing locking nut or key in position and put the end cover on top of rotor shaft. Then place the rotor assembly along with the end cover or housing inside the stator maintaining its alignment. Use a soft hammer to push the end cover on top of the rotor shaft. Once placed inside use the fasteners and locking nut to secure to its position.
Place the end cover on the other side of the motor along with the fan if any and box up the system; securing them together using lock nut, tie rod and bolts using reverse tightening method. Once reassembled move the motor back to its original position using chain block; and secure to the foundation area using fasteners, shims and other locking arrangement.
Make sure its firmly secured to the foundation area or block and not misaligned. If so make necessary adjustments before connecting back with the pump or associated system. Connect the electrical connections and do a final testing for one last time; do not forget to check the freeness of the shaft.
If all good its time to start the motor and monitor its performance for a while before considering fit till next maintenance.

What Goes Wrong With Motor And How to Identify Problems ?
Let’s face it; not every one have this luxury as we ( marine engineers ) do to perform preventive planned maintenance. While preventive planned maintenance are efficient and save money in long run; not everyone is capable to spend on unnecessary repairs when the parts is still functional and not yet damaged.
So its important to know what are the thing which generally go wrong in an electrical motor; and how to identify them just before any serious damage happen. While electrical motors can malfunction in a many different ways; but only eight causes accounts for majority of problem.
They are extreme operating condition, Over-Current, vibration, lower insulation resistance, Overheating, dirt and moisture. Let us understand each of them how they leads to faults and problem on a one on one basis.
1 ) Extreme Working Condition
Every machine including electrical motors that’s ever built are tested and designed to perform at their capacity; under a definite range of working condition. One of the important factor that plays role in deciding life of motor or regularly of their maintenance; is the temperature of the surrounding area and the motor itself.
A motor is designed to work efficiently within a temperature range of -25 to 45 degree Celsius. Prolonged working under condition below and above; leads to change in insulation resistance and life of bearings. Similarly poor hygiene such as poor ventilation or chocked ventilation ports of a motor; can leads to over heating and winding’s burnout.
2 ) Over Current
The electrical motors draw in current to their winding’s in order to produce necessary field to produce torque. Now when more than stated current pass through these winding; the situation is called as over current. These winding’s are designed to carry the rated current safely for indefinite interval of time.
An over current condition can be caused due to short circuit, high voltage or too low voltage forcing winding’s to draw heavy current. This can leads to over heating and burning of the winding’s. Furthermore this negatively affects the resistance of the insulation and electrical contact points.
3 ) Vibration
The vibration in electrical motors can be due to a number of reasons including; poorly secured motors to their platform, improper alignment, damaged bearings and corrosion. It can be both external as well as internal; the external vibration loosen the fasteners, electrical connections and lock nut while internal vibration leads to damage and rubbing of surfaces.
Other than normal wear and tear it also negatively affects the efficiency and power output; and thus need to be keep in check. This can be done by proper maintenance and regular monitoring of vibration levels.
4 ) Lower Insulation Resistance
One of the leading cause of motor failure; lower insulation resistance accounts for almost 70 percent of total motor failure. It is a situation in which the insulation resistance decrease over time; generating scope for leakage current to flow and short circuit the wingdings. While its easy to know of its effects its harder to actually detect on time.
Initially the insulation resistance have an resistance value as high as 1 mega ohm; but with time, heat, moisture and damage the resistance gradually reduce to alarming extent. In such condition it no longer avoid electrical contact between the conductor and the winding’s; thus resulting in short circuit of motor winding’s.
5 ) Overheating
If lower insulation resistance is the mother of all motor troubles; overheating is definitely his father. A motor can generally over heat under very high or too low voltage condition; when it takes in more current within winding’s then it really should at first place generating lots of heat.
Another reason why electrical motors overheat are the poor air ventilation, over loading and extremely hot surrounding environment. This leads to loss of insulation, power and efficiency loss in short run while winding burnout, damage to bearings and damaged stator in long run.
6 ) Dirt And Moisture
Foreign particles such as dust and small metal pieces can stick to the ventilation ducts and restrict passage of fresh air. Furthermore deposited dust on winding’s restricts proper heat dissipation and often leads to over heating. Many a times small scraps of metal or rock get in between the stator and rotor assembly; restricting shaft movement.
On another hand moisture can corrode parts of the electric motor while equally reducing insulation in place. It latch on to the shaft, rotor and the bearings corroding and restricting their working. It lead to leakage current, loss of efficiency and damage to parts due to corrosion making the motor in-workable.
Common Problem Indicating Scenario’s
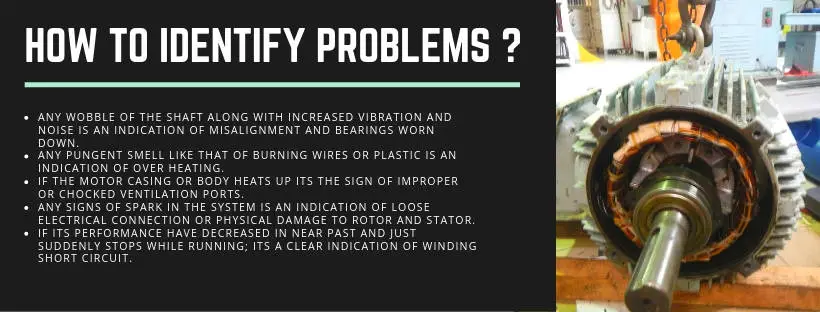
- Any wobble of the shaft along with increased vibration and noise is an indication of misalignment and bearings worn down.
- Any pungent smell like that of burning wires or plastic is an indication of over heating.
- If the motor casing or body heats up its the sign of improper or chocked ventilation ports.
- Any signs of spark in the system is an indication of loose electrical connection or physical damage to rotor and stator.
- If its performance have decreased in near past and just suddenly stops while running; its a clear indication of winding short circuit.
Also Read:
- Why We Maintain Small Vacuum In Atmosphere Condenser ?
- Fire Detector Types And Their Working Principle
- What Are Logbook And For What They Are Used For ?
- Fresh Water Generator – How Sea Water Is Made Drinkable !

